A new-ish alternative to session-based cookies that’s well-suited to single page apps is token-based authentication.
There are many SaaS services such as Auth0, Stormpath and Login Radius that are pretty easy to set up. If you can use one of those in your organization, you should—it will save you a lot of time. But if you’re stuck hosting your data yourself you will need to look at a product like IdentityServer4 or ForgeRock. Today’s blog entry is the result of my evaluation of integrating OpenID Connect and SignalR using IdentityServer4.
TL;DR The code for this example is at https://github.com/mikebridge/IdentityServer4SignalR/.
Edit Apr 28, 2017:
Since writing this post I’ve switched from IdentityServer to Auth0.
Before you get started, you should realize that implementing IdentityServer4 requires a lot of coding. The spec is rather confusing, the documentation is voluminous and the project maintainers don’t do much hand-holding, so the learning curve is steep. Caveat Emptor!
The Basic Idea
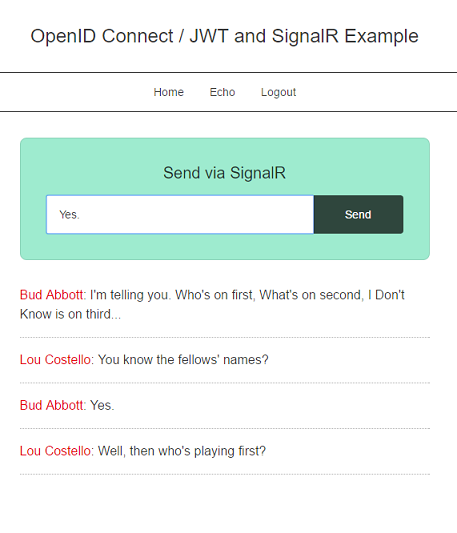
The basic idea is this: we send a user from our JavaScript application to a web server running IdentityServer4. IdentityServer4 hands out two tokens to the user if he can prove his identity somehow (maybe via social media, maybe via password), and the user then sends one of the tokens he receives to our API—in this demo, a very simple SignalR Chat App API. Our API then authenticates that token to determine whether the user should have access to a particular API call.
This sounds simple, but there’s a lot of configuration to do to get there. You may want to check out the previous blog post about configuring SignalR with DotNet Core.
JWTs, or JSON Web Tokens is what connects everything together. JWT tokens can contain information about the identity of someone (like names, email addresses, etc.) as well as other information, such as permissions or roles. Bits of information contained in the payload of a JWT token are called “claims”—e.g. I claim that my name is “Mike” and I claim to have “admin” access, the issuing server claims that the token expires at midnight, and so on.
Tokens are signed by IdentityServer4 and verified by any app that has access to the right information. Because asymmetric keys have the advantage that there is no shared secret to protect among all the clients that need to authenticate users, we’ll be using them in this demo. So in our case, a IdentityServer has a private key, and any client that wishes to identify the token will have the corresponding public key. (The installation of test keys is described in the example project.)
IdentityServer4
IdentityServer4 gives you a large number of options and supports several different authentication “flows”, depending on the type of client. A client is the application accessing IdentityServer—either a native application, a traditional web application or a JavaScript-based application. Each flow is a grant type. Since we’re using React, we’ll use the OpenID Connect Implicit grant type, which was developed for that kind of client application. In other grant types, there is client secret that is explicitly passed to identify a client, but since we’re passing the information in the clear via javascript, the client identifies itself implicitly by passing a “redirect URI” to IdentityServer4 (which tells where to redirect the user after the authentication procedure is complete), and IdentityServer4 will check that URI against its list of allowed URIs. There’s a good explanation of this here.
One confusing thing: OpenID Connect generates two JWT tokens with overlapping information: an identity token and an access token. This is apparently for backward-compatibility reasons. Both contain your claims, but there are some slight differences between the two tokens—there are some extra security features with Identity Tokens (e.g. nonce validation against cross-site request forgery), but it will be the access tokens that get passed to our SignalR server. Here’s a more complete explanation.
Set up IdentityServer4
To start using IdentityServer4, you should download one of the examples and use that as a starting point. As I mentioned, the suggested flow for an SPA application is Implicit, so if you’re using ASP.Net Identity you may want to start with QuickStart 6. But for this example we’ll use QuickStart 7 which will allow us to implement our own backing store later.
All you need from the example is the IdentityServer project— we can ignore the rest of the solution for now.
NOTE: You need to upgrade to at least IdentityServer4 version 1.0.2. I’m using 1.1.1. Versions prior to 1.0.2 had a bug that prevented claims from being included in the access token.
  "dependencies": {
    "IdentityServer4": "1.1.1"
  }
In Visual Studio, create an empty Solution and add this new “IdentityServer” quickstart project to it.
To secure an app, you need to identify the resources that you want to protect. The terminology on this is somewhat confusing—and it changed recently from “scopes“. In this app we need Identity Resources—the user’s Id and Name, as well as API Resources—the name of our API.
For our application we’ll use define the profile information we want to receive about the user in Config.cs
like this:
public static IEnumerable<IdentityResource> GetIdentityResources()
{
    var userProfile = new IdentityResource
    {
        Name = "profile.user",
        DisplayName = "User profile",
        UserClaims = new[] { "name" }
    };
    // these resources will be requested by name in the javascript client
    return new List<IdentityResource>
    {
        new IdentityResources.OpenId(),
        new IdentityResources.Email(),
        new IdentityResources.Profile(),
        userProfile
    };
}
These claims will show up in each token.
Next, we want to protect our Chat API as an API Resource. We’ll define our resource with the string “chatapi” in Config.cs:
public static IEnumerable<ApiResource> GetApiResources()
{
    return new List<ApiResource>
    {
        new ApiResource("chatapi", "Chat API"),
    };
}
Our flow is going to be Implicit. So we need to tell IdentityServer to accept requests from our
JavaScript Client application:
public static IEnumerable<Client> GetClients()
{
    const string baseUrl = "http://localhost:3000";

    return new List<Client>
    {

        new Client
        {
            // an arbitrary name that we'll pass from the js client
            ClientId = "js.implicit",
            ClientName = "JavaScript Client",
            AllowedGrantTypes = GrantTypes.Implicit,
            AllowAccessTokensViaBrowser = true,

            RedirectUris =
            {
                // this where the word "implicit" in "implicit flow"
                // comes from---we are implicitly telling the
                // server that we own the domain that hosts
                // the callback page.  The server knows the domain is valid
                // because the domain is whitelisted in the Client configuration.
                UrlUtils.UrlCombine(baseUrl, "/callback")
            },
            PostLogoutRedirectUris =
            {
                baseUrl
            },
            AllowedCorsOrigins =
            {
                baseUrl
            },
            AllowedScopes =
            {
                IdentityServerConstants.StandardScopes.OpenId,
                IdentityServerConstants.StandardScopes.Profile,
                IdentityServerConstants.StandardScopes.Email,
                "chatapi"
            },
            RequireConsent = false, // we don't want the "Consent" Screen
            AllowRememberConsent = false,
            AlwaysSendClientClaims = true,
            AlwaysIncludeUserClaimsInIdToken = true,
            AccessTokenType = AccessTokenType.Jwt,
            // UpdateAccessTokenClaimsOnRefresh = true
        }

    };
}
In a real application, there would probably be a database of users—but for this example,
we’ll create an in-memory test store.
called TestUserService.cs
We’ll also define our own “IProfileService”. This is not described in the IdentityServer4 documentation, but its purpose is to describe all the claims that will show up in both the identity token and the access token:
using System;
using System.Collections.Generic;
using System.Linq;
using System.Security.Claims;
using System.Threading.Tasks;
using IdentityModel;
using IdentityServer4.Extensions;
using IdentityServer4.Models;
using IdentityServer4.Services;

namespace IdentityServer.Services
{
    public class LocalProfileService : IProfileService
    {
        private readonly ILocalUserService _userService;

        public LocalProfileService(ILocalUserService userService)
        {
            _userService = userService;
        }

        /// <summary>
        /// Side Effect: this mutates context.IssuedClaims with the user's identity properties if the
        /// user is found.  Otherwise do nothing.
        /// </summary>
        /// <param name="context"></param>
        /// <returns></returns>
        public async Task GetProfileDataAsync(ProfileDataRequestContext context)
        {
            /*
             * see: https://damienbod.com/2016/11/18/extending-identity-in-identityserver4-to-manage-users-in-asp-net-core/
             * The Identity properties need to be added to the claims so that the client SPA or whatever client it
             * is can use the properties. In IdentityServer4, the IProfileService interface is used for
             * this. Each custom ApplicationUser property is added as claims as required.
             */

            // the "subject" is where the unique user id goes.  Ours is a Guid.
            var identityidString = context.Subject.GetSubjectId();
            Guid identityid;
            bool success = Guid.TryParse(identityidString, out identityid);
            if (!success)
            {
                return;
            }

            // find the user from the database
            var user = await _userService.FindAsync(identityid);

            if (user == null)
            {
                return;
            }
            var claims = new List<Claim>
            {
                new Claim(JwtClaimTypes.FamilyName, user.FamilyName, ClaimValueTypes.String),
                new Claim(JwtClaimTypes.GivenName, user.GivenName, ClaimValueTypes.String),
                new Claim(JwtClaimTypes.Name, user.FullName, ClaimValueTypes.String),
                new Claim(JwtClaimTypes.Id, user.Id.ToString(), ClaimValueTypes.String),
                new Claim(JwtClaimTypes.PreferredUserName, user.UserName, ClaimValueTypes.String)
            };
            // hard-code access to "chatapi.user"----normally this would come from a
            // database!
            claims.Add(new Claim(JwtClaimTypes.Role, "chatapi.user"));
            claims.Add(new Claim(JwtClaimTypes.Scope, "chatapi"));

            context.IssuedClaims = claims;

        }

        public async Task IsActiveAsync(IsActiveContext context)
        {

            var sub = await Task.FromResult(context.Subject.GetSubjectId());

            // here we hard-code "isactive" to true, but in a real application
            // you might have a "inactive" status.
            context.IsActive = true;

        }
    }

}
Note that we’re hardcoding the claims in this example. And we’ve create a scope called
chatapi, and a role within that scope called chatapi.user. A scope is a custom set
of claims, and we’re defining a particular claim as a role. The role name is what we’ll use later in
the familiar [Authorize(Roles="chatapi.user")]
annotation in the SignalR Hub.
We can wire all this up during initialization in Startup.cs.
public void ConfigureServices(IServiceCollection services)
{
    services.AddMvc();

    services.AddIdentityServer()
        // note: you may need to pass the StoreLocation to this next
        // call depending on where you deploy IdentityServer.
        // You may need to use StoreLocation.LocalMachine.
        .AddSigningCredential("CN=ExampleTest")
        .AddInMemoryIdentityResources(Config.GetIdentityResources())
        .AddInMemoryApiResources(Config.GetApiResources())
        .AddInMemoryClients(Config.GetClients())
        // we define our own "profile service"
        .AddProfileService<LocalProfileService>();

        // register our own store of test users & passwords.
        services.AddSingleton<ILocalUserService, TestUserService>();
    }
}
You’ll also have to set up the key pair if you haven’t done that already.
Single Page App
Interaction with IdentityServer4 is done with the oidc-client JavaScript javascript library. My implementation is React/Redux-specific so I won’t go into it in too much detail.
The oidc configuration in the JavaScript client has to match with our Client configuration in IdentityServer4. Here’s how I set it up:
import { globalConfig } from "./env";

const authUrl = globalConfig.baseIdentityUrl;
const baseUrl = globalConfig.currentBaseUrl;

export const oidcImplicitSettings = {
    // URL of your OpenID Connect server.
    // The library uses it to access the metadata document

    // authority points to our IdentityServer
    authority: authUrl,

    // the client_id is an arbitrary string that matches our IdentityServer4 ClientId
    client_id: "js.implicit",

    // after the user has authenticated with IdentityServer, he will get redirected
    // to our callback page.
    redirect_uri: `${baseUrl}/callback`,

    post_logout_redirect_uri: `${baseUrl}/index`,

    // For JavaScript clients, we want both an identity token and an
    // access token as per Openid Connect.
    response_type: "id_token token",

    // Resources requested during the authorisation request
    scope: "openid email profile chatapi",

    // Number of seconds before the token expires to trigger
    // the `tokenExpiring` event
    accessTokenExpiringNotificationTime: 4,

    // Do we want to renew the access token automatically when it's
    // about to expire?
    automaticSilentRenew: true,

    // Do we want to filter OIDC protocol-specific claims from the response?
    filterProtocolClaims: true,

    nonce : "N" + Math.random() + "" + Date.now()
};
The “response_type” specifies that we want both an id token and an access token, as per the OpenID Connect specification. The scope is “openid email profile chatapi”, which reflects the resources that we configured in the Config.cs
We will launch the login process here with the
const oidcManager = new Oidc.UserManager(oidcImplicitSettings);
oidcManager.signinRedirect(...);
Then on the callback page you’ll need to get the user object:
userManager.signinRedirectCallback().then(result => {
      userManager.getUser().then(user => {
          // save the user!
          console.log("logged in!);
          console.log(user);
      }).catch((e) => {
          console.error(e);
      });
At the very least, you’ll need to save the user.access_token to pass through to
SignalR—this is the JWT access token. You should have a look at the contents at
http://jwt.io.
SignalR: Client-Side
SignalR wasn’t built to interact with token-based authentication. Your two options are: 1) pass the token in the query string or 2) pass the token as a parameter to a server-side call. The first option is a little less yucky, so we’ll do that.
I also won’t describe how to use SignalR, except to note that you’ll need to set the “.qs” on your HubConnection:
hubConnection.qs = token ? `authtoken=${user.access_token}` : "";
Annoyingly, you have to disconnect and reconnect if your access_token changes, e.g. it expires and you need to renew it.
(My demo-quality react connector is here.)
SignalR: Server-Side
If you’ve gotten this far the last thing to do is to translate the incoming request into something that the native DotNet core authentication system can handle. In a WebApi you can use the Microsoft.AspNetCore.Authentication.JwtBearer middleware, but to authenticate with SignalR we’ll need to add an extra middleware layer.
My ChatAPI package.json contains these dependencies:
{
 "dependencies": {
    "Microsoft.AspNetCore.Diagnostics": "1.0.0",
    "Microsoft.AspNetCore.Server.IISIntegration": "1.0.0",
    "Microsoft.AspNetCore.Server.Kestrel": "1.0.1",
    "Microsoft.Extensions.Logging.Console": "1.0.0",
    "Microsoft.Extensions.Configuration.Json": "1.1.0",
    "Microsoft.Extensions.Configuration.FileExtensions": "1.1.0",

    "Microsoft.AspNetCore.Cors": "1.1.0",
    "Microsoft.AspNetCore.Mvc": "1.1.1",
    "Microsoft.AspNetCore.Mvc.Core": "1.1.1",
    "Microsoft.AspNetCore.Owin": "1.1.0",
    "Microsoft.IdentityModel.Tokens": "5.1.2",
    "Microsoft.AspNetCore.Authentication.JwtBearer": "1.1.0",
    "Microsoft.AspNet.SignalR": "2.2.1"
  }
}
Setting up SignalR is a little finicky because it hasn’t been updated for DotNet Core, but there’s more detail in this previous blog post
We’ll add in the basic configuration to Startup.cs:
public class Startup
{
    // ...

    public void ConfigureServices(IServiceCollection services)
    {
        services.AddCors();
        // NOTE: unhandled Exception: System.InvalidOperationException: Unable to resolve service for type
        // 'System.Text.Encodings.Web.UrlEncoder' while attempting to activate
        // 'Microsoft.AspNetCore.Authentication.JwtBearer.JwtBearerMiddleware'
        // is resolved by AddAuthentication (esp. if it's not brought in by MVC config)
        services.AddAuthentication();
    }

     public void Configure(IApplicationBuilder app, IHostingEnvironment env, ILoggerFactory loggerFactory)
     {
         JWTInitialization.Initialize(app, Configuration);

         app.UseCors(policy =>
         {
             //policy.WithOrigins("*");
             policy.WithOrigins("http://localhost:3000");
             policy.AllowAnyHeader();
             policy.AllowAnyMethod();
             policy.AllowCredentials();
         });
     }

    // ...
}
We’ll need to write the middleware that watches for our authtoken and puts it into an
Authorization header:
using System;
using System.Linq;
using Akka.Util.Internal;
using Microsoft.AspNetCore.Builder;

namespace ChatAPI.Auth
{

    /// <summary>
    /// Middleware to intercept a query string bearer token value (since SignalR isn't
    /// able to use a Header) into an auth header so that the Jwt handler can see it.
    /// </summary>
    public static class JwtSignalRExtensions
    {
        private static readonly String AUTH_QUERY_STRING_KEY = "authtoken";

        public static void UseJwtSignalRAuthentication(this IApplicationBuilder app)
        {
            app.Use(async (context, next) =>
            {
                if (string.IsNullOrWhiteSpace(context.Request.Headers["Authorization"]))
                {
                    try
                    {
                        if (context.Request.QueryString.HasValue)
                        {

                            var token = context.Request.QueryString.Value
                                .Split('&')
                                .SingleOrDefault(x => x.Contains(AUTH_QUERY_STRING_KEY))?
                                .Split('=')
                                .Drop(1)
                                .First();

                            if (!string.IsNullOrWhiteSpace(token))
                            {
                                context.Request.Headers.Add("Authorization", new[] {$"Bearer {token}"});
                            }

                        }

                    }
                    catch
                    {
                        // if multiple headers it may throw an error.  Ignore both.
                    }
                }
                await next.Invoke();
            });

        }
    }
}
To configure the JWT authentication and wire the query-string processing middleware and the JWT processing middleware together is verbose:
using System;
using System.Collections.Generic;
using System.Security.Cryptography.X509Certificates;
using Microsoft.AspNetCore.Builder;
using Microsoft.Extensions.Configuration;
using Microsoft.IdentityModel.Tokens;

namespace ChatAPI.Auth
{
    public static class JWTInitialization
    {

        public static void Initialize(IApplicationBuilder app, IConfigurationRoot configuration)
        {
            ConfigureJwtAuth(app, configuration);
        }

        private static X509Certificate2 GetCertificateFromStore(string certName)
        {
            // Get the certificate store---you may need to change the StoreLocation
            // depending on where this is deployed.
            // using (X509Store store = new X509Store(StoreName.TrustedPeople, StoreLocation.CurrentUser))
            using (X509Store store = new X509Store(StoreName.TrustedPeople))
            {
                store.Open(OpenFlags.ReadOnly);

                // Place all certificates in an X509Certificate2Collection object.
                X509Certificate2Collection certCollection = store.Certificates;

                // If using a certificate with a trusted root you do not need to FindByTimeValid, instead:
                // currentCerts.Find(X509FindType.FindBySubjectDistinguishedName, certName, true);
                X509Certificate2Collection currentCerts = certCollection.Find(X509FindType.FindByTimeValid, DateTime.Now,
                    false);
                X509Certificate2Collection signingCert = currentCerts.Find(X509FindType.FindBySubjectDistinguishedName,
                    certName, false);
                if (signingCert.Count == 0)
                    return null;
                // Return the first certificate in the collection, has the right name and is current.
                return signingCert[0];
            }
        }

        private static void ConfigureJwtAuth(IApplicationBuilder app, IConfigurationRoot configuration)
        {
            var jwtAppSettingOptions = configuration.GetSection("JwtIssuerOptions");

            var selector = jwtAppSettingOptions["CertName"];
            if (selector == null)
            {
                throw new Exception("The CertName is not configured in the appsettings");
            }
            var cert = GetCertificateFromStore(selector);

            if (cert == null)
            {
                Console.Error.WriteLine("Unable to find cert for " + selector);
                throw new Exception("Unable to find cert for " + selector);
            }

            var tokenValidationParameters = new TokenValidationParameters
            {
                ValidateIssuer = true,
                ValidIssuer = jwtAppSettingOptions["Issuer"],
                ValidateAudience = true,
                ValidAudience = jwtAppSettingOptions["Audience"],
                ValidateIssuerSigningKey = true,
                IssuerSigningKeys = new List<SecurityKey>
                {
                    new X509SecurityKey(cert)
                    // If there are multiple valid keys, configure them here,
                    // e.g. during a key migration.
                },
                RequireExpirationTime = true,
                ValidateLifetime = true,
                ClockSkew = TimeSpan.Zero
            };

            // add middleware to translate the query string token
            // passed by SignalR into an Authorization Bearer header
            app.UseJwtSignalRAuthentication();

            // then add the standard JWT processing layer AFTER
            // the SignalR layer.
            app.UseJwtBearerAuthentication(new JwtBearerOptions
            {
                AutomaticAuthenticate = true,
                AutomaticChallenge = true,
                TokenValidationParameters = tokenValidationParameters
            });

        }

    }
}
SignalR
Crap, that was a lot of work to get to here. But now that it’s set up, we can use
the Microsoft.AspNet.SignalR.Authorize header. (Don’t get this far and
add the incompatible WebAPI Authorize header by accident!)
[Authorize(Roles = "chatapi.user")]

    public class EchoHub : Microsoft.AspNet.SignalR.Hub
    {
       //...
    }